Welcome to our new tutorial on How to Display Posts on a Page in WordPress.
Whether you’re running a blog, a news site, or any content-driven website, showing posts on a dedicated page can enhance user experience and improve site navigation.
In this article, we will show you how to display all your WordPress posts on one page or any page.
Previously, we created this tutorial- How to beautifully display a post on WordPress.
When to Display Your Posts on One or Any Page?
WordPress comes with built-in archive pages for each category, tag, author, and date. However, many website owners prefer creating custom archive pages to control exactly what content is shown to visitors.
For example, you might use a custom archive page to highlight your site’s most popular posts or to show a date-based compact archive.
Displaying all your posts on one page helps visitors jump straight to the content they’re interested in. This list can also serve as a good starting point for visitors who are unsure what to read next.
With that in mind, let’s explore a few different ways to display all your WordPress posts on one page. Use the quick links below to jump straight to your preferred method.
- Method 1: Using the Latest Posts Block
- Method 2: Using the Advanced Post Block Plugin
Method 1: Using the Latest Posts Block of Gutenberg
You can display all your WordPress posts on one page by using the Latest Posts block in either the Gutenberg Block Editor or the Full Site Editor.
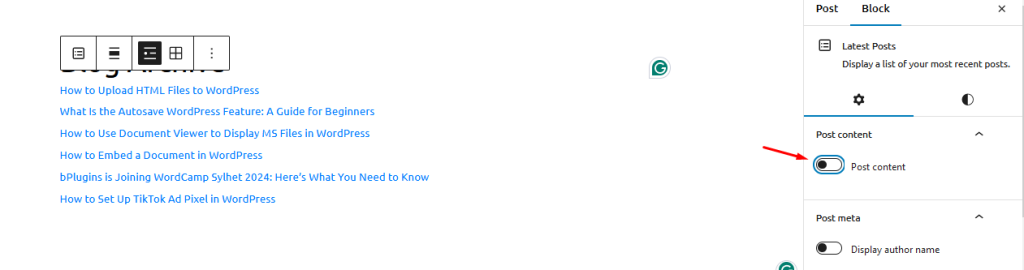
The following image shows an example of how the block may look on your website.
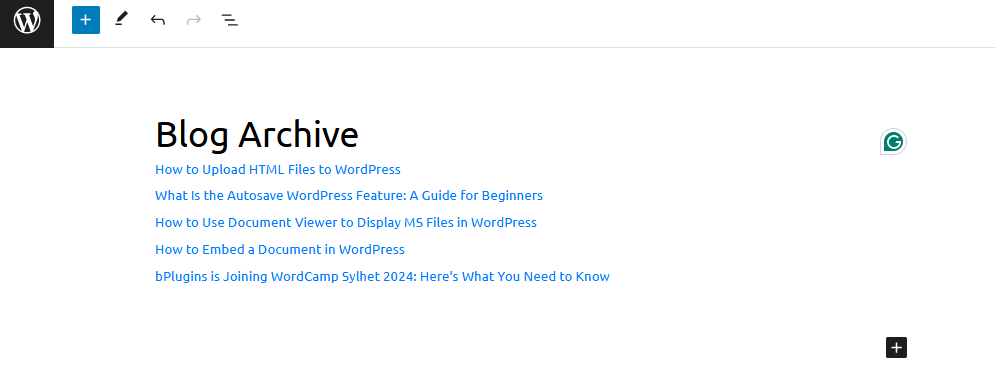
One advantage of this method is that it doesn’t require installing a new plugin. However, the Latest Posts block can display a maximum of 100 WordPress posts.
If you need to show more than 100 posts, you’ll need to use an alternative method described in this guide.
You can add the Latest Posts block to a page or post, or incorporate it into a block-based theme using the Full Site Editor.
For this example, we’ll demonstrate how to add it to a post. The steps are similar for any other part of your website.
To begin, click the + button and type ‘Latest Posts.’
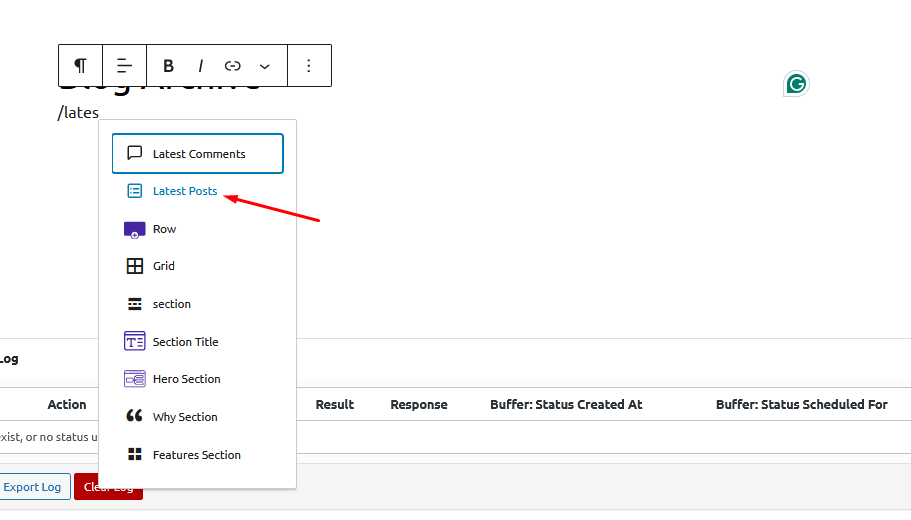
You can add the block to your page by clicking on ‘Latest Posts.’
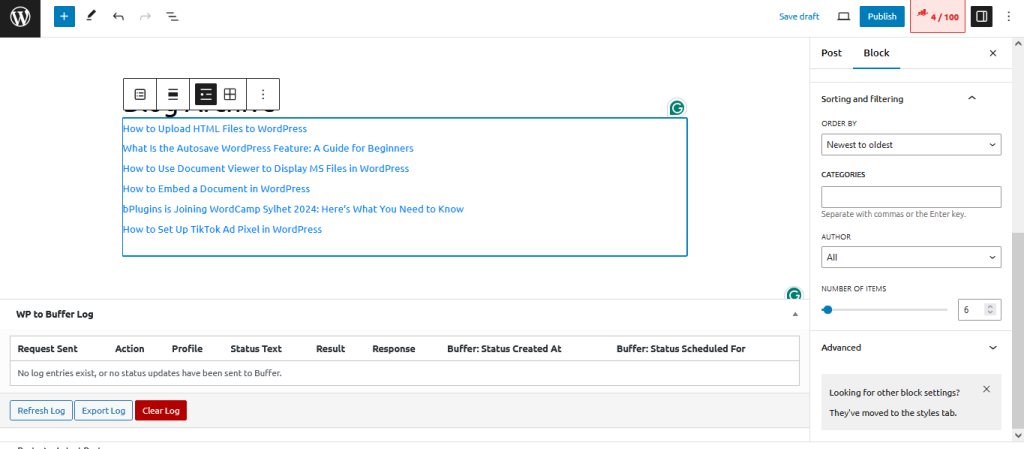
You can customize the Latest Posts block in several ways, but start by finding the ‘Number of items’ section in the right-hand menu.
This setting determines how many posts the block will display to visitors of your WordPress blog. To show all your posts, typically, you’ll enter ‘100’ in the text box, which is the maximum.
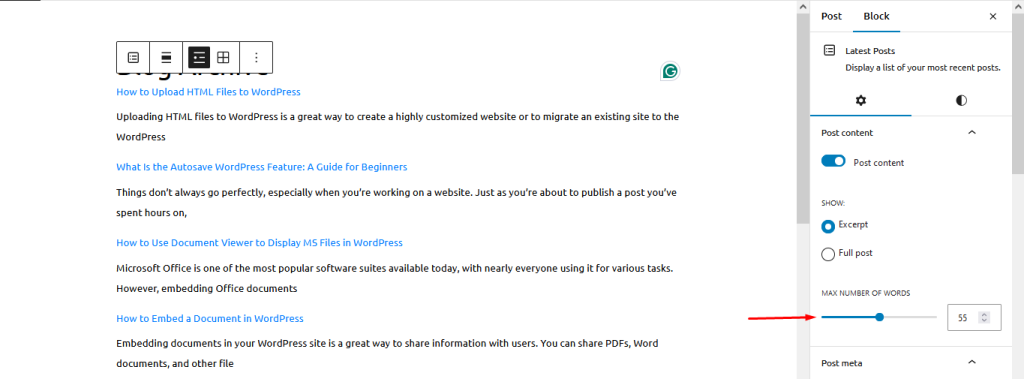
By default, the Latest Posts block will only display the title of each post. However, you may want to provide visitors with a preview of each post’s content by showing an excerpt.
To enable this, go to the ‘Post content settings’ in the right-hand menu and toggle on the ‘Post content’ option.
Once you’ve done that, click to select the ‘Excerpt’ setting.
Then drag the ‘Max number of words in excerpt’ toggle to change how many words are included in the post excerpt.
If you run a multi-author WordPress blog, you may want to include the post’s author in your list by using the ‘Display author name’ toggle.
This can help visitors find posts by their favorite authors.
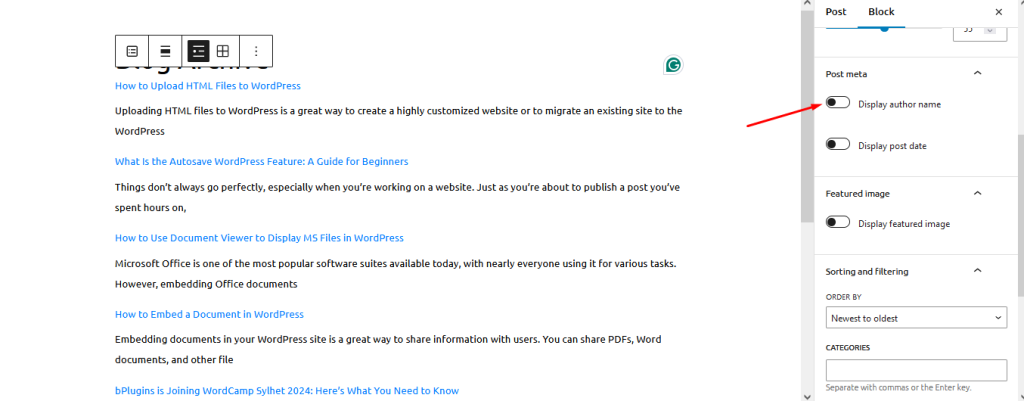
You may also want to show the date when the post was published by using the ‘Display post date’ toggle.
There are additional settings you might want to explore, but these basic adjustments should work well for most websites.
Once you’re satisfied with how the list looks, you can either publish or update the page. Now, when you visit this page on your site, you’ll see a list of all your WordPress posts.
Method 2: Using the Advanced Post Block Plugin
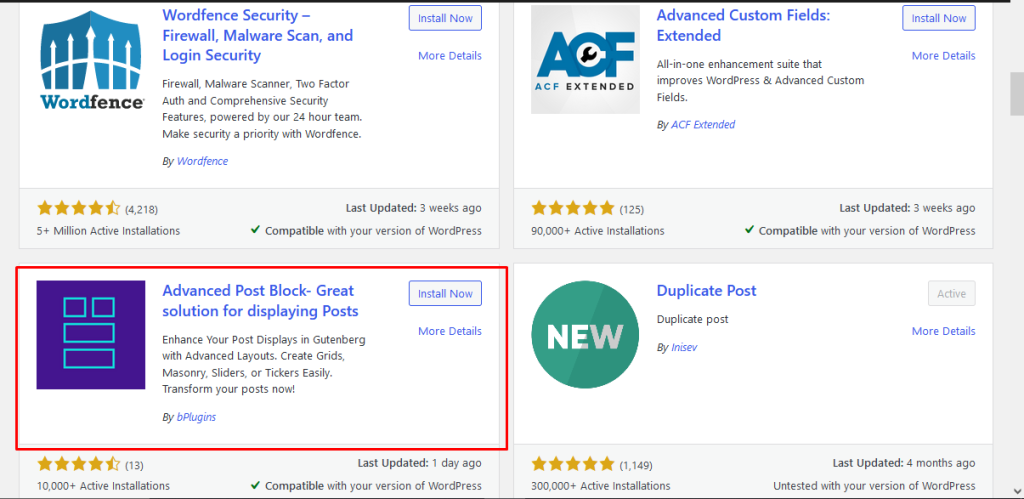
If you want more advanced features to show your posts on a WordPress page, then you can use a plugin like Advanced Post Block Plugin.
The Advanced Post Block plugin for WordPress is a tool designed to enhance the display of posts on your website. This plugin allows users to create and customize various post layouts using a simple block interface, integrating seamlessly with the Gutenberg editor.
Key features include multiple post layouts (such as grid, list, and slider), support for custom queries, and extensive customization options for styling and content display.
Here is how you can display all your posts on a WordPress page using the Advanced Post Block plugin-
First you need to install the plugin from the WordPress dashboard. Just log into your WordPress Admin dashboard. Click on the left-side Plugin menu. Now, on the right side, search for the Advanced Post Block.
Click on the Install Now button. Once the plugin is installed, click on the Activate button.
Add a blank page from Pages–> Add New. Give a title to your page and click on the “+” button. FInd the Advanced Posts block and click on it.
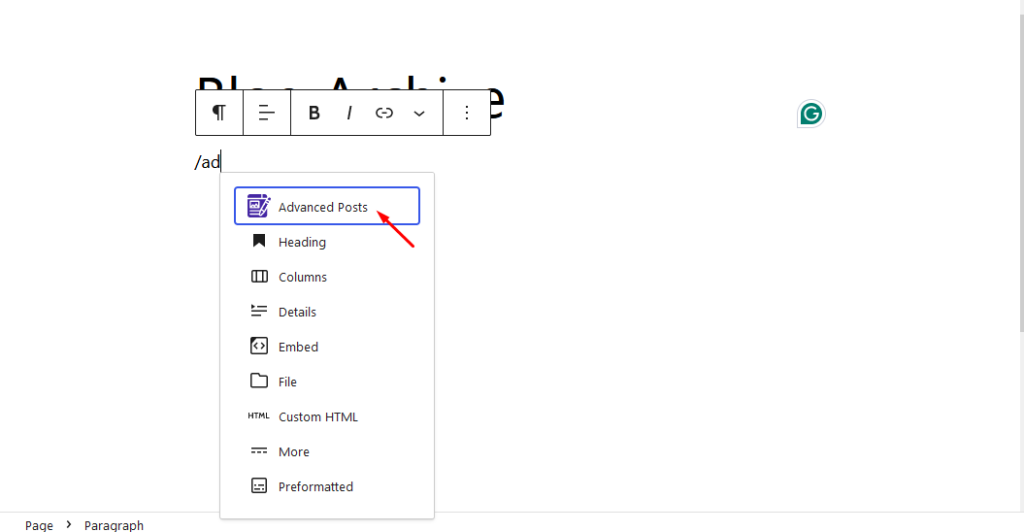
Choose the block and you will see all your posts in the page.
You can change the layout, add different styles, and customize how the posts will look. There are more customization options in the Pro version, you can read this guide to find the premium options for the Advanced Post Block Plugin.

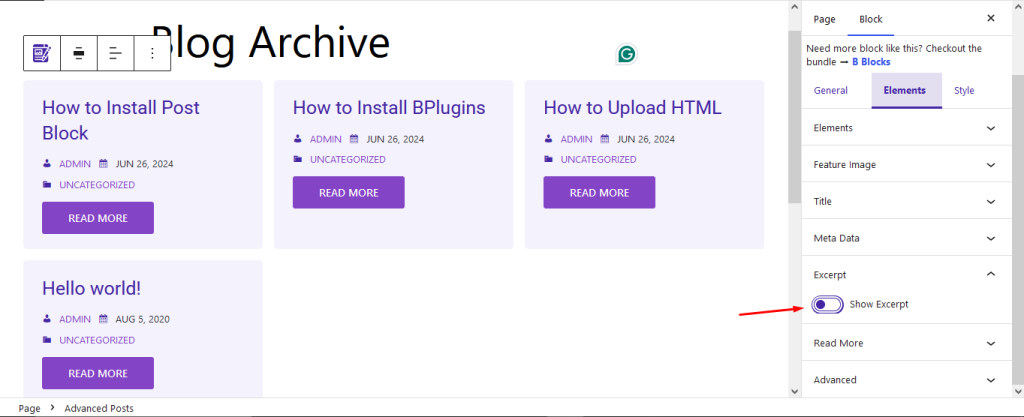
Also, you can show excerpt of your posts as well. Just enable the SHow Excerpt option from the Elements tab-
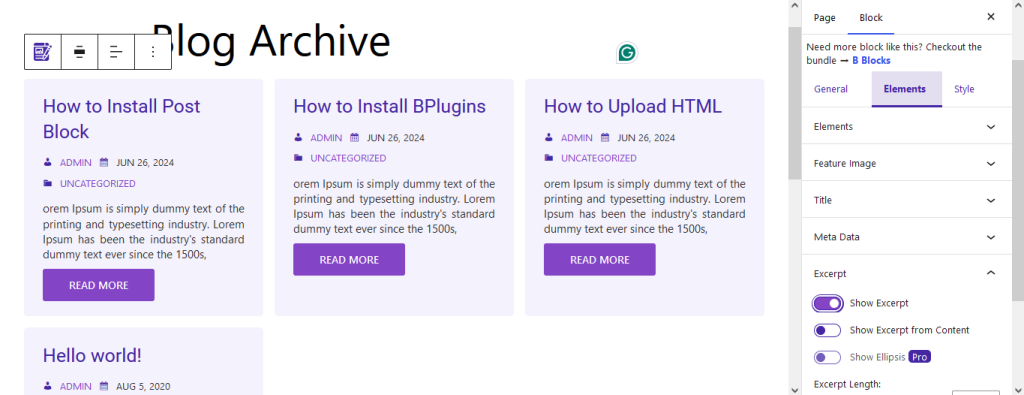
You will see that the excerpts are shown just like the screenshot below-
This is how you can show WordPress posts on a page or any page.
Last Words on How to Display Posts on a Page in WordPress
If you follow these steps, you can effectively display posts on a page in WordPress, providing your visitors with a streamlined way to access your content.
Whether you choose to use the Latest Posts block, a custom page template, or a specialized plugin, WordPress offers flexible options to suit your needs.
Improve your site’s functionality and user experience by organizing your posts efficiently, ensuring your audience can easily find and enjoy your content.