 Voice Feedback
 There are three ways to install and activate the Voice Feedback plugin on your WordPress site. Let’s learn all of those way.
2. Install via WordPress Plugin Directory (Recommended)
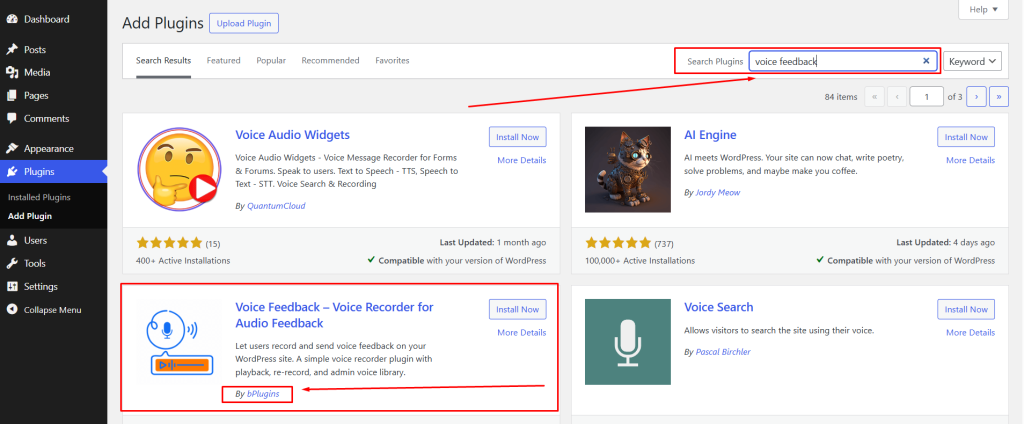
- Login to your WordPress dashboard.
- Go to Plugins > Add New.
- In the search bar, type:
Voice Feedback. - Find the plugin named Voice Feedback from the list and make sure which is developed by bPlugins.
- Click on Install Now.
- Once installed, click Activate.
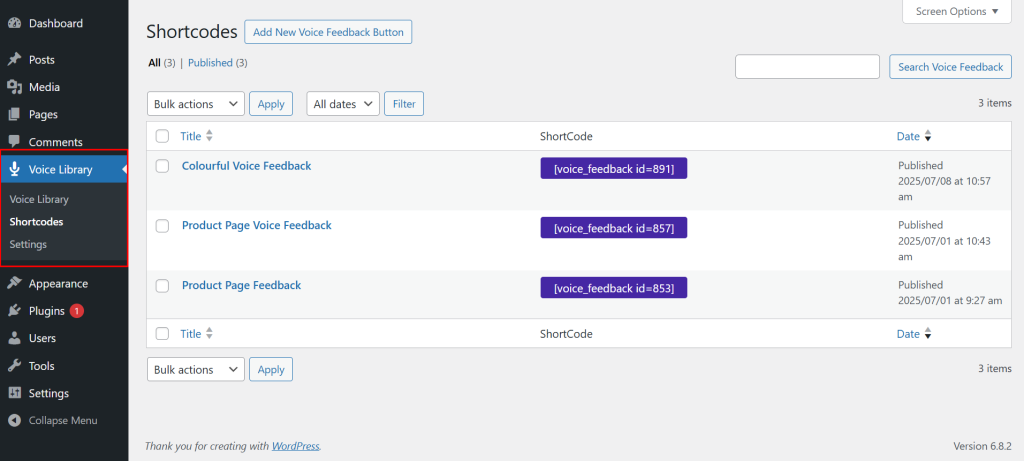
- After activation you’ll see a option on your dashboard sidebar called Voice Feedback and after active if you go to your website you will see a feedback drawer added.
1. Install via ZIP Upload
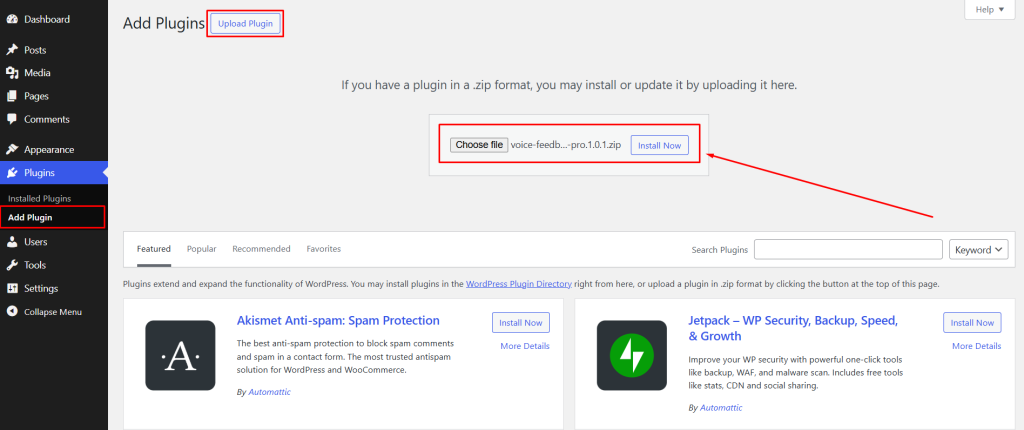
- Download the latest version of the Plugin (.zip file) from bPlugins website or WordPress.org
- Login to your WordPress dashboard.
- Go to Plugins > Add New.
- Click on the Upload Plugin button at the top.
- Select the downloaded
.zipfile and click Install Now. - After the installation, click Activate.
After activation you’ll see a option on your dashboard sidebar called Voice Feedback and after active if you go to your website you will see a feedback drawer added.
3. Install the Plugin via FTP
- Extract the above-selected zip file (voice-feedback.zip). It will create a “voice-feedback” folder with all Plugin files and folders inside it
- Using your FTP programs like Filezilla or cPanel, upload the non-zipped Plugin folder into the /wp-content/plugins/ folder on your server
- Go to the Dashboard » Plugins » Installed Plugins page and find “Voice Feedback” from the Plugin list
- Click on Activate Button to activate the Voice Feedback Plugin
After activation you’ll see a option on your dashboard sidebar called Voice Feedback and after active if you go to your website you will see a feedback drawer added.