When you want to control how your posts look in WordPress, the default options don’t always give you the flexibility you need. Maybe you want to show posts from a certain category, highlight featured content, or create a custom blog layout—without touching any code.
That’s where the Advanced Post Block plugin helps.
It’s a Gutenberg block plugin that lets you display posts dynamically by category, author, post type, and more—all from inside the WordPress editor.
Whether you’re building a magazine-style homepage, a filtered blog section, or a custom archive for events or tutorials, this plugin gives you full control over the layout and design.
In this post, you’ll learn how to use Advanced Post Block, what makes it useful, and how you can use it in real WordPress sites.
Let’s dive in!
How to Use Advanced Post Block (Step-by-Step Guide)
Advanced Post Block is simple and beginner-friendly, making it easy to display posts exactly how you want.
In this section, we’ll walk you through the setup process step by step, so you can learn how to install the plugin, adjust the settings, and customize your post layouts with ease.
Install and activate the plugin
Navigate to your WordPress admin area. Go to Plugins → Add New and search for Advanced Post Block. Now, install and activate the plugin.
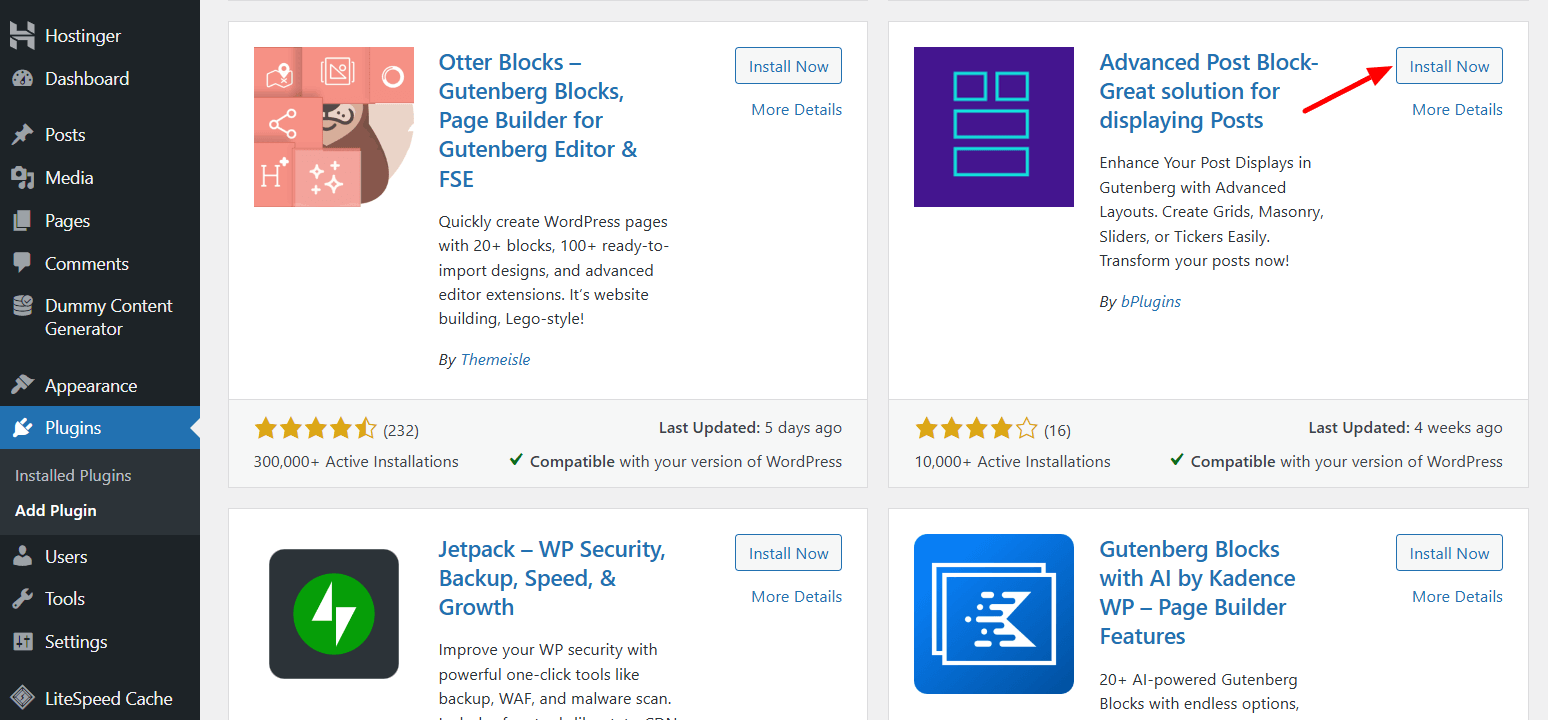
Note: If you’ve installed the pro version, you need the license key to activate the plugin.
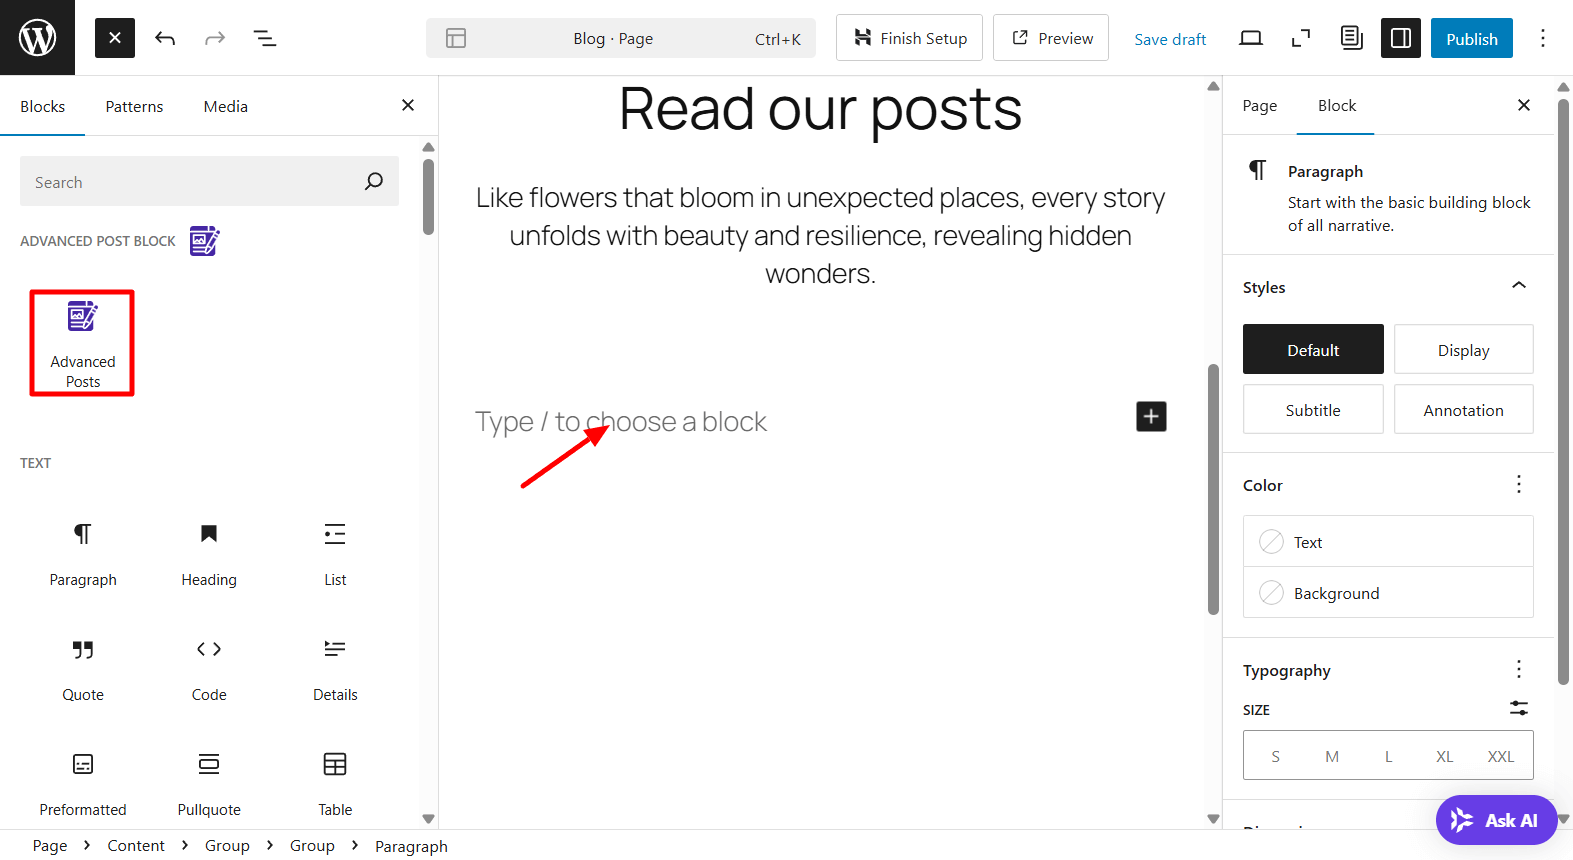
Add the Block and Select Layout
Open the page in the WordPress editor panel. Click the “+” icon to open the block library and look for the Advanced Post Block.
Add the block to the suitable area.
After adding the Advanced Post Block to your editor, you’ll find its settings in the right sidebar.
In the General → Layout section, you can choose how your posts are displayed—options include grid, masonry, slider, and ticker layouts.
You can also select a sub layout to refine the design even further. Adjust the number of columns, as well as the column and row gaps, to control spacing between posts.
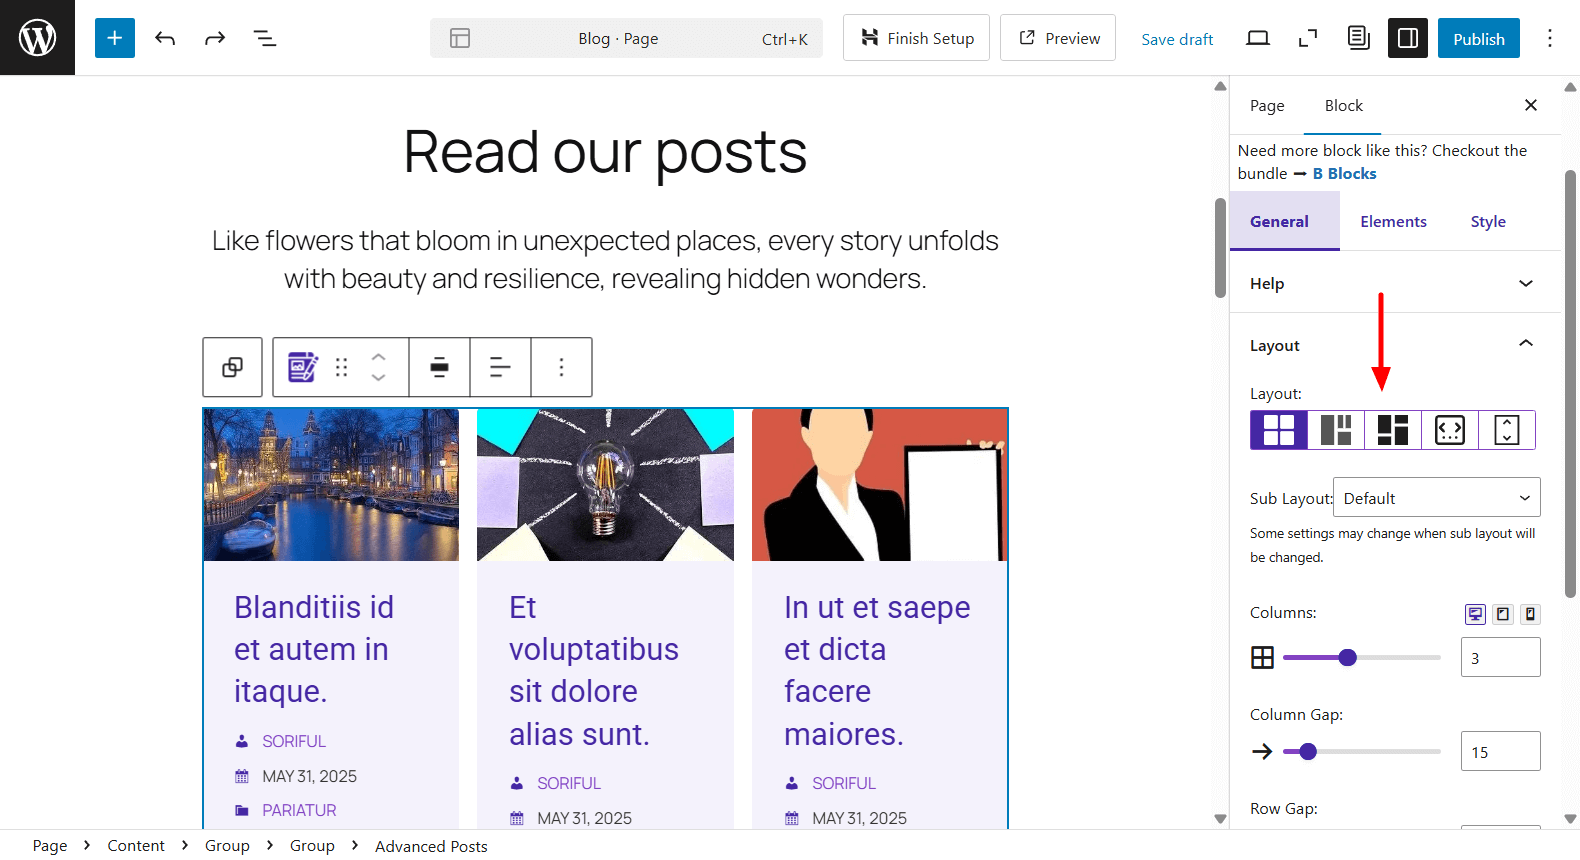
For a more polished design, you can enable options like equal height for post cards and set a consistent content/texts height. These settings help create a clean, uniform look across all posts in the layout.
The Posts Query section lets you choose which posts to show and how they appear. First, pick the Post Type; this could be regular blog posts, pages, or any custom post types on your site. Then, you can filter the posts by category or tag to display only the content you want.
You can control how many posts to show using the Post Per Page setting. Use the Post Order By option to sort posts by date, title, author, and more. You can also choose whether the list appears in ascending or descending order.

If you’re using the Pro version, you get extra filters like Post Offset (to skip a number of posts), Include Posts and Exclude Posts (by post ID), and Exclude Current Post.
These advanced options help you build more dynamic layouts, like hiding the current post, creating a featured section, or showing related posts on a single page.
Navigate to the Elements tab to style individual parts of each post, including the featured image, title, meta information, excerpt, and the read more button.
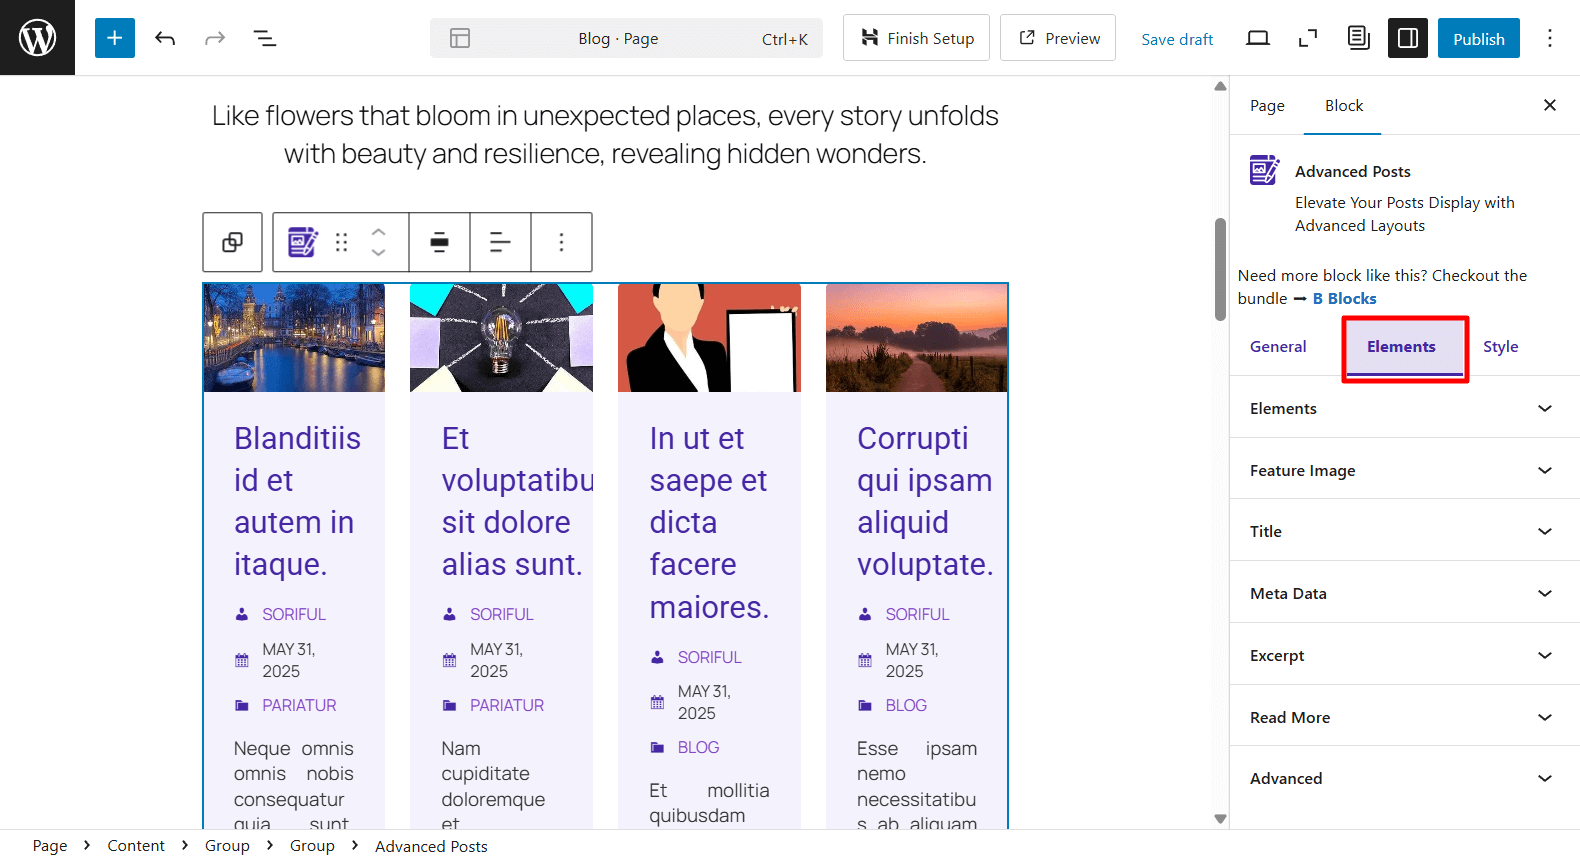
In the Meta Data settings, you can choose which extra information to display with each post, such as the author name, publish date, categories, tags, reading time, and comment count.
You can start by enabling the Author option to show the name of the post author. With the Pro version, you can also add an author link and a custom author icon using a URL.
Next, you can turn on the Date to show when the post was published. The Pro version lets you customize the date format and add a date icon for a more polished look.
For post Categories, you can choose where they appear (inside the image or content area), and Pro users can also include a category icon.
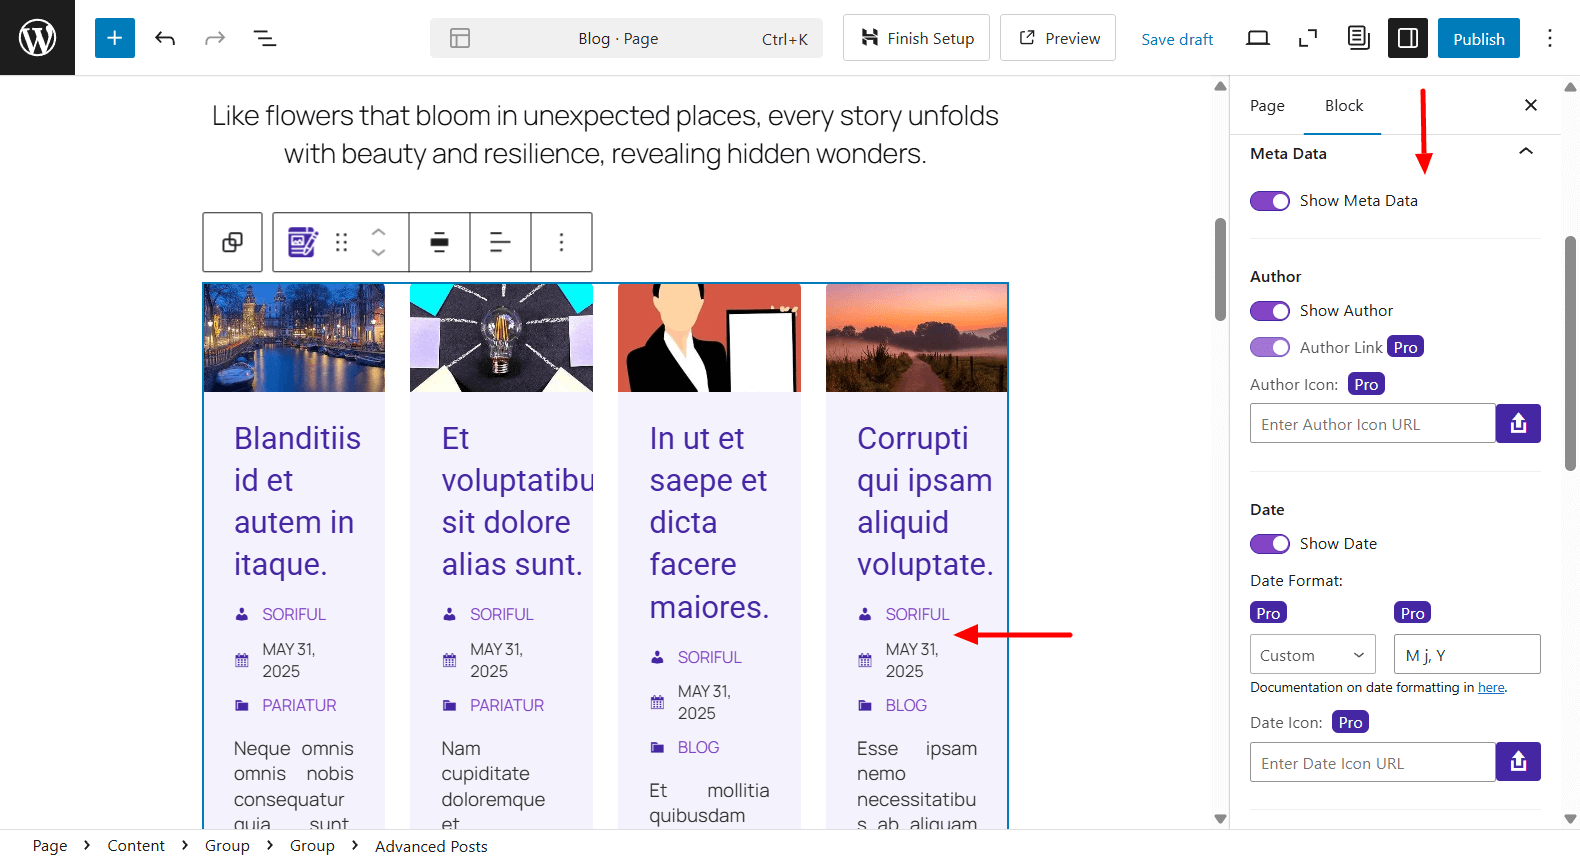
The Taxonomies section allows you to display tags, but this feature is available only in the Pro version.
If you’d like to show how long a post might take to read, you can enable Reading Time (Pro feature). You can customize the reading time label (e.g., “Min read”), show it in seconds, and even add an icon.
Finally, you can enable the Comment count to display how many comments each post has received.
These meta options help you provide useful information at a glance and make your post layouts more informative and engaging.
Under the Style > Content section, you can control the overall appearance of the post content area.
You can start by setting the Text Alignment, choosing left, center, or right alignment depending on your design preference.
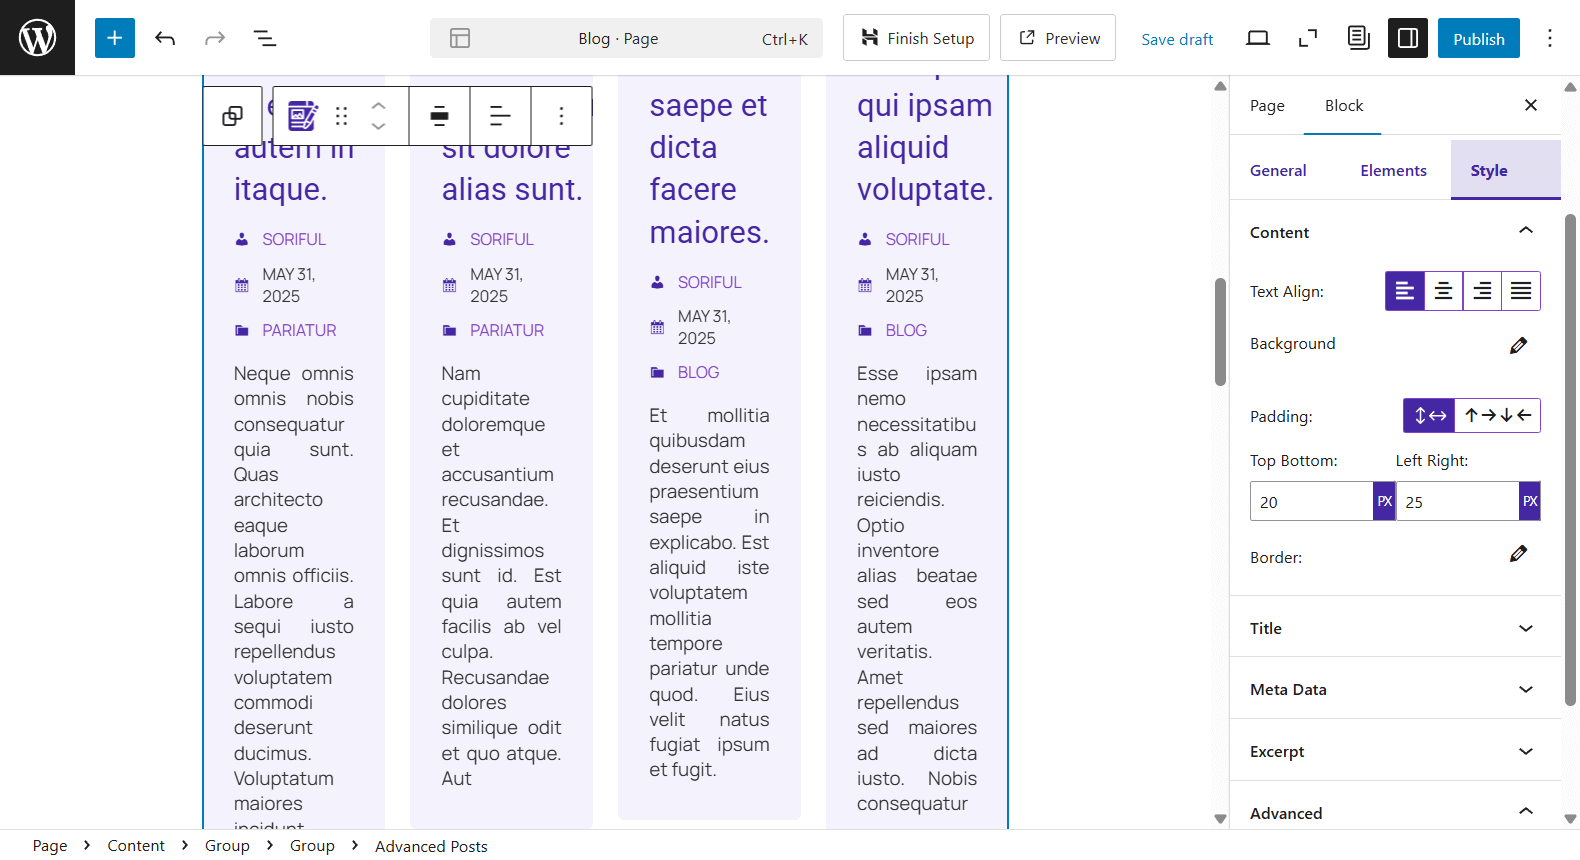
The Background option lets you apply a background color or image behind the content section of each post card, helping you match the layout with your site’s branding.
Next, you can adjust the Padding to control the spacing inside the content area.
You can also apply a Border around the content block to give it more structure or visual separation. This is useful for creating card-style post layouts with a clean and modern look.
In the Style > Meta Data section, you can customize how your post’s meta information looks, such as the author name, publish date, categories, and more.
You can start by adjusting the Typography to control the font size, weight, line height, and letter spacing. This lets you match the meta text style with the rest of your site’s design.
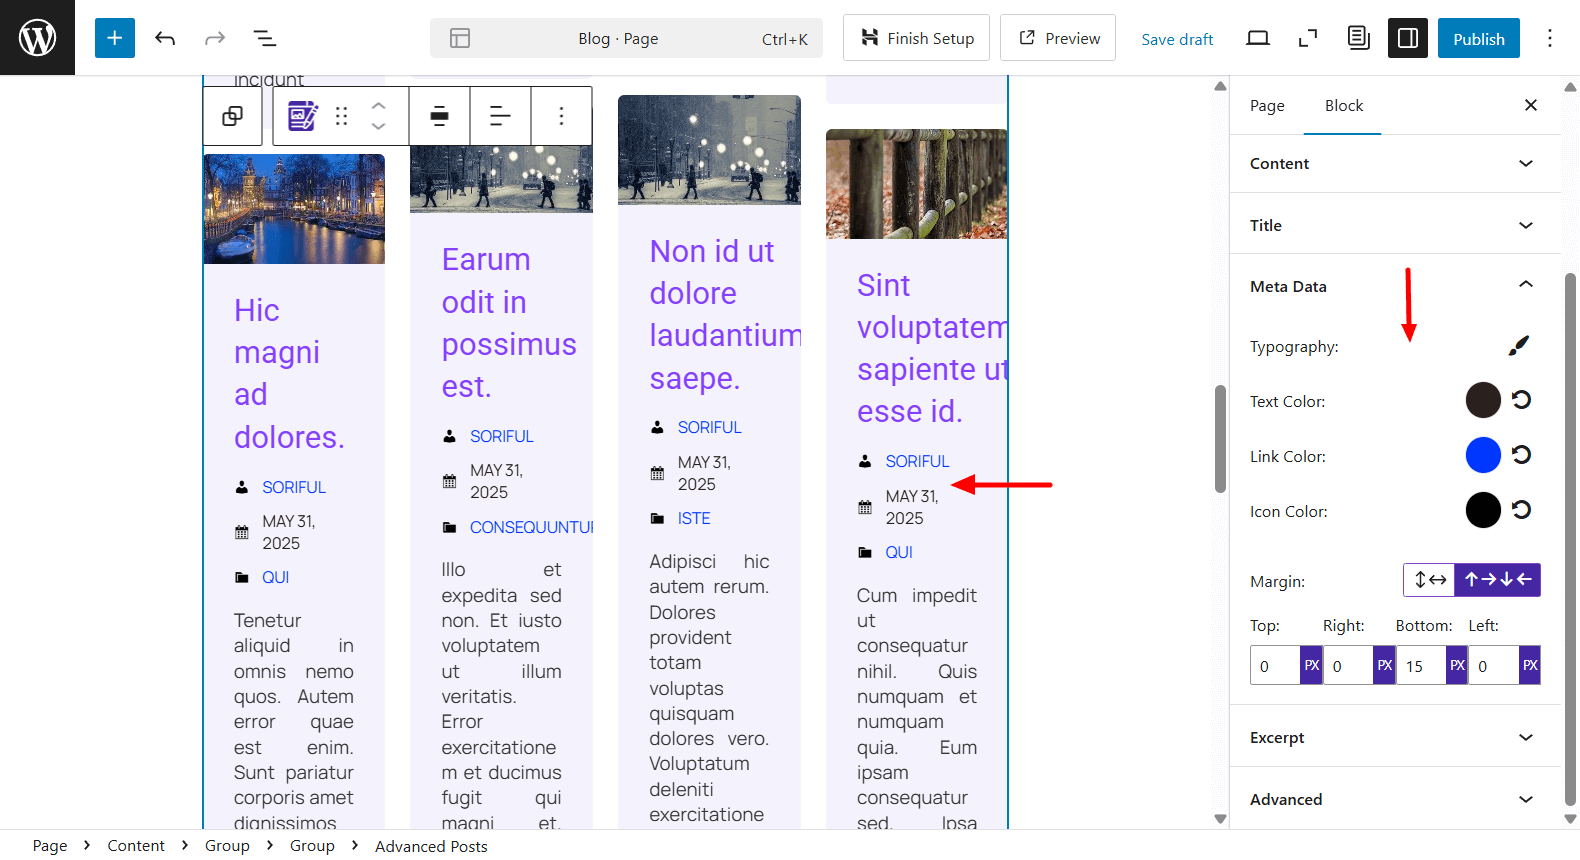
The Text Color setting allows you to choose a custom color for the meta text, while Link Color changes the color of any clickable meta elements, like the author name or category links.
If you’re using icons (like a calendar for date or user icon for author), you can also set a specific Icon Color to make them stand out or match your brand colors.
Lastly, use the Margin controls to set the spacing around the meta data.
In the Style tab, you can also control the appearance of key post elements like the Title, Excerpt, and Read More link.
For each of these, you’ll find options to customize typography, text color, hover effects, spacing, and more. Whether you want bold, eye-catching titles or a minimalist “Read More” button, you have full control over how each piece looks.
Once you’re happy with how everything looks, simply hit the Publish or Update button to save your changes.
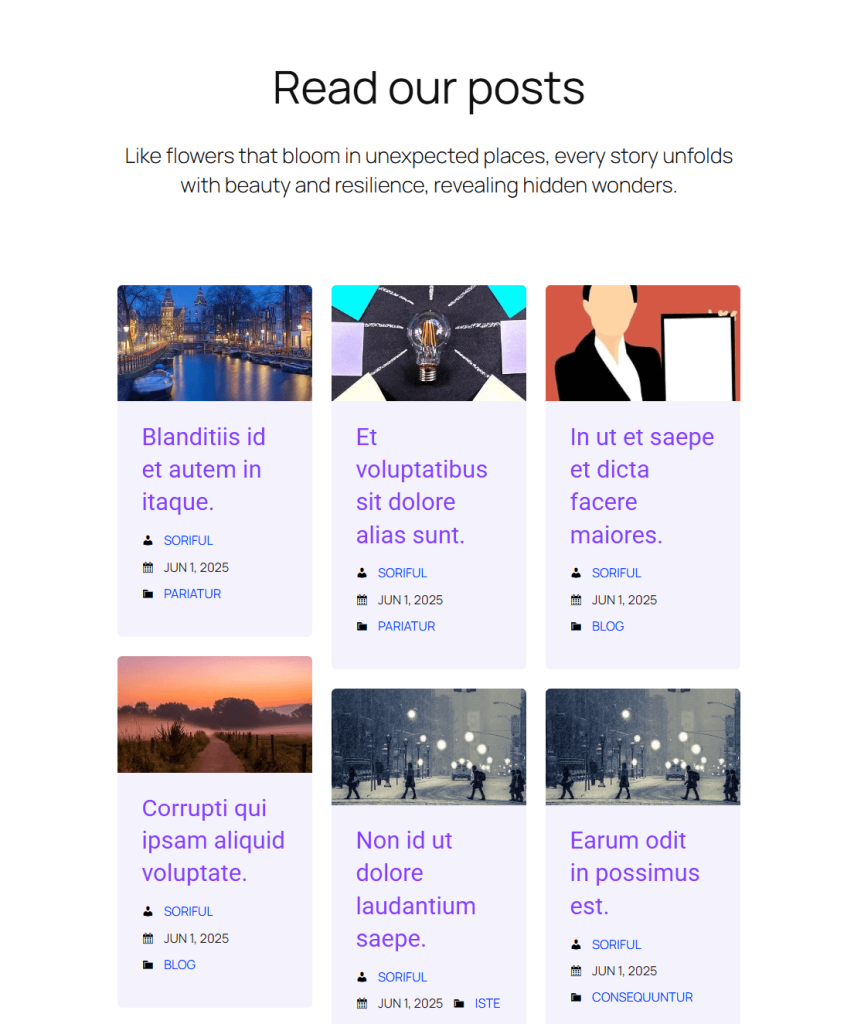
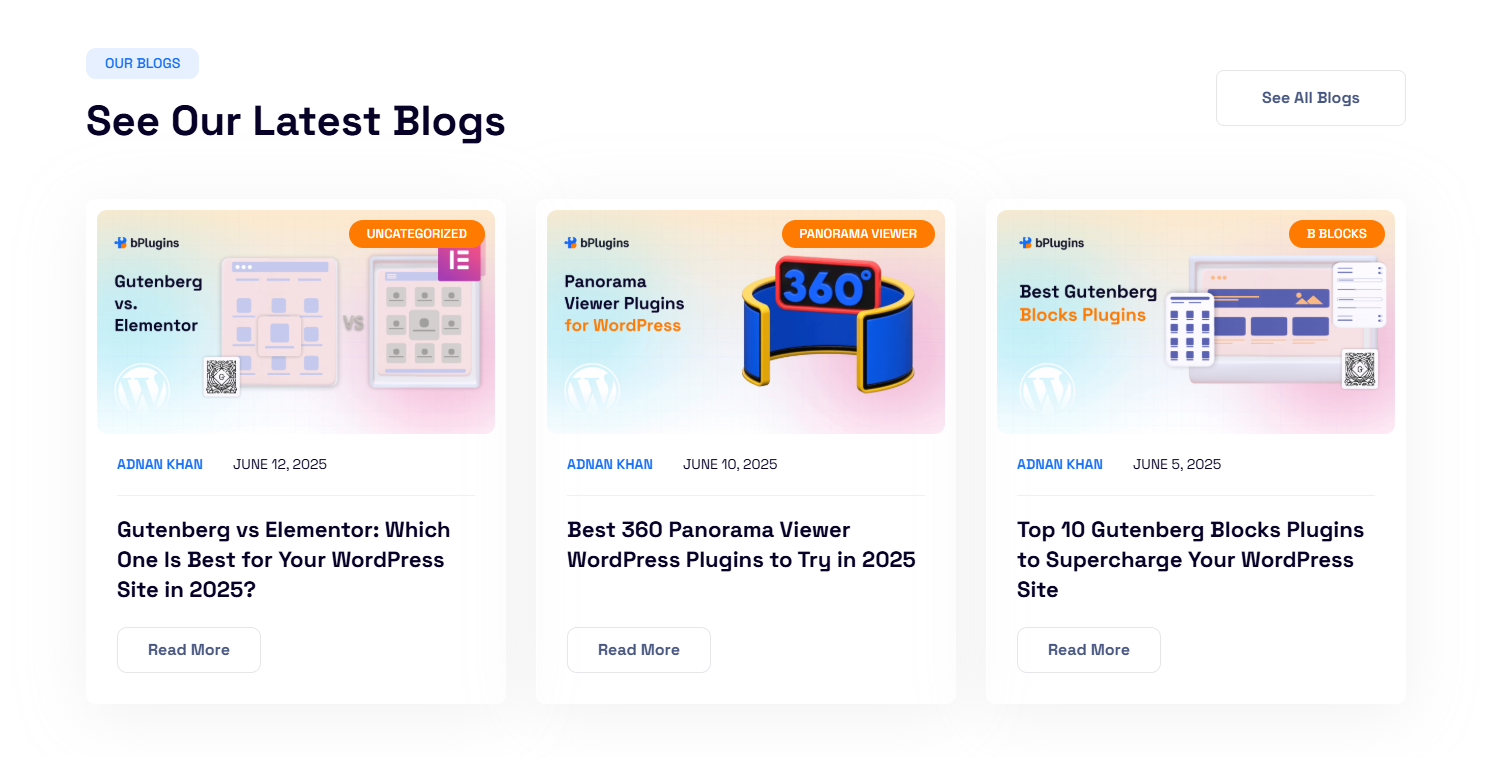
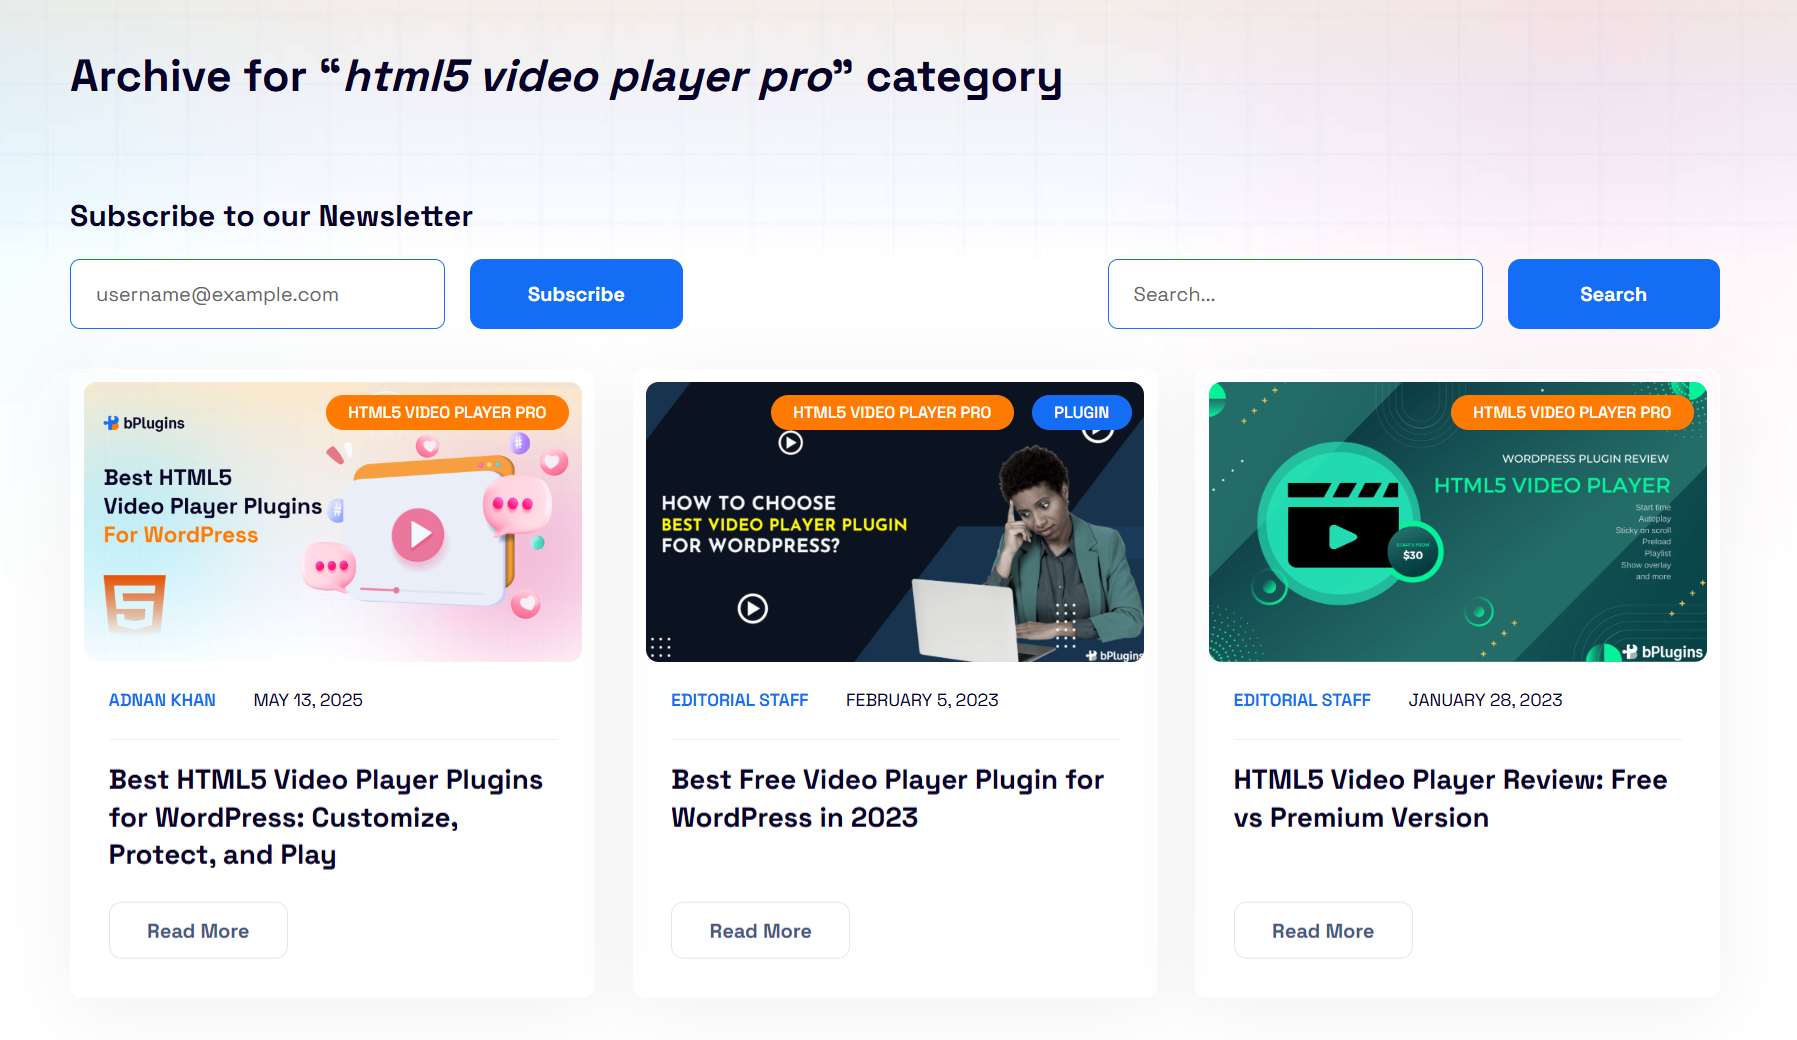
If you’ve followed these steps, your post layout will look clean, well-structured, and fully matched to your content style, just like the example shown below.
Advantages of Using Advanced Post Block
Advanced Post Block stands out as a powerful yet easy-to-use plugin for anyone looking to display posts dynamically within the Block Editor. Below are some of the core advantages that make it a valuable tool for WordPress site builders, bloggers, developers, and agencies.
Gutenberg Native – No Need for External Builders
One of the most appealing aspects of Advanced Post Block is that it’s built specifically for Gutenberg. You don’t need to rely on third-party page builders or custom templates to create custom post layouts.
Everything happens inside the native Block Editor, which keeps your workflow lightweight, fast, and aligned with future WordPress updates. This makes it an excellent choice for users who want more control without the complexity of switching editors or plugins.
No-Code Layout and Design Control
Designing visually appealing post sections no longer requires CSS or template tweaks. With Advanced Post Block, you can fully customize the appearance of your post layouts using simple block settings.
Choose between grid or list views, adjust the size and visibility of post thumbnails, enable or disable meta fields like author and date, and fine-tune the length of excerpts. It empowers non-technical users to build professional layouts quickly and confidently.
Flexible Post Filtering (Category, Author, Date, Taxonomy)
Advanced Post Block gives you granular control over what content appears in each block. You can filter posts by categories, authors, publish dates, or even custom taxonomies. This flexibility is ideal for organizing content by topic, contributor, or purpose.
Whether you’re creating a section for “Latest Reviews,” “Posts by Jane,” or “Case Studies from 2023,” the plugin makes it easy to tailor your layout to your site’s structure and your audience’s interests.
Works with Custom Post Types
Beyond standard blog posts, Advanced Post Block supports all custom post types registered on your site. That means you can display content like portfolios, products, courses, events, testimonials, and more.
This makes the plugin especially useful for business websites, eLearning platforms, agency portfolios, and niche content hubs.
Responsive Design with Grid and List Layout Options
Every layout you build with Advanced Post Block is mobile-friendly and responsive out of the box. Whether you’re displaying posts in a multi-column grid or a clean, single-column list, your content will automatically adjust to fit any screen size.
This ensures that users enjoy a consistent reading experience whether they’re browsing on a desktop, tablet, or phone.
Lightweight and Performance-Optimized
Despite its powerful features, Advanced Post Block is built to be fast and efficient. It doesn’t add unnecessary bloat to your website, keeping page loads quick and performance smooth.
The plugin is written with clean code and optimized for speed, which helps maintain your Core Web Vitals scores and ensures a friction-free experience for your visitors. It’s a smart solution for anyone who values speed as much as design flexibility.
Advanced Post Block Use Cases for WordPress
The Advanced Post Block plugin offers a wide range of practical use cases that help you present content dynamically without writing a single line of code.
Whether you’re building a homepage, a blog archive, or a content-rich landing page, this block can help you create polished layouts that are both functional and visually appealing.
Let’s explore some of the most effective ways you can use the Advanced Post Block to enhance your WordPress site:
Homepage Featured Posts
One of the most popular uses for Advanced Post Block is to highlight selected posts on the homepage. You can configure the block to display:
- The latest blog posts
- Posts from specific categories or tags
- Handpicked featured posts using a custom taxonomy or sticky post setting
With built-in layout controls, you can choose between grid or list views, show or hide featured images, and fine-tune meta information like post date, author, or excerpt length, giving you full control over how your homepage content is presented.
Category-Specific Blog Sections
Segmenting your homepage or blog index by content category is a great way to improve user experience and navigation. With Advanced Post Block, you can:
- Display “News,” “Tutorials,” “Reviews,” or other categories in separate blocks
- Customize each section with its own layout and color scheme
- Filter content by taxonomy and limit the number of posts shown
This approach turns your blog into a more organized, magazine-style format that helps visitors find relevant content quickly.
Display Custom Post Types
Advanced Post Block isn’t limited to blog posts—it also supports custom post types. This makes it a perfect fit for sites that manage:
- Events or webinars
- Portfolios and case studies
- Courses or lessons
- WooCommerce products
You can filter by custom taxonomies, sort by meta values, and design the output to match your theme style, without installing a separate plugin for each content type.
Author-Specific Post Page
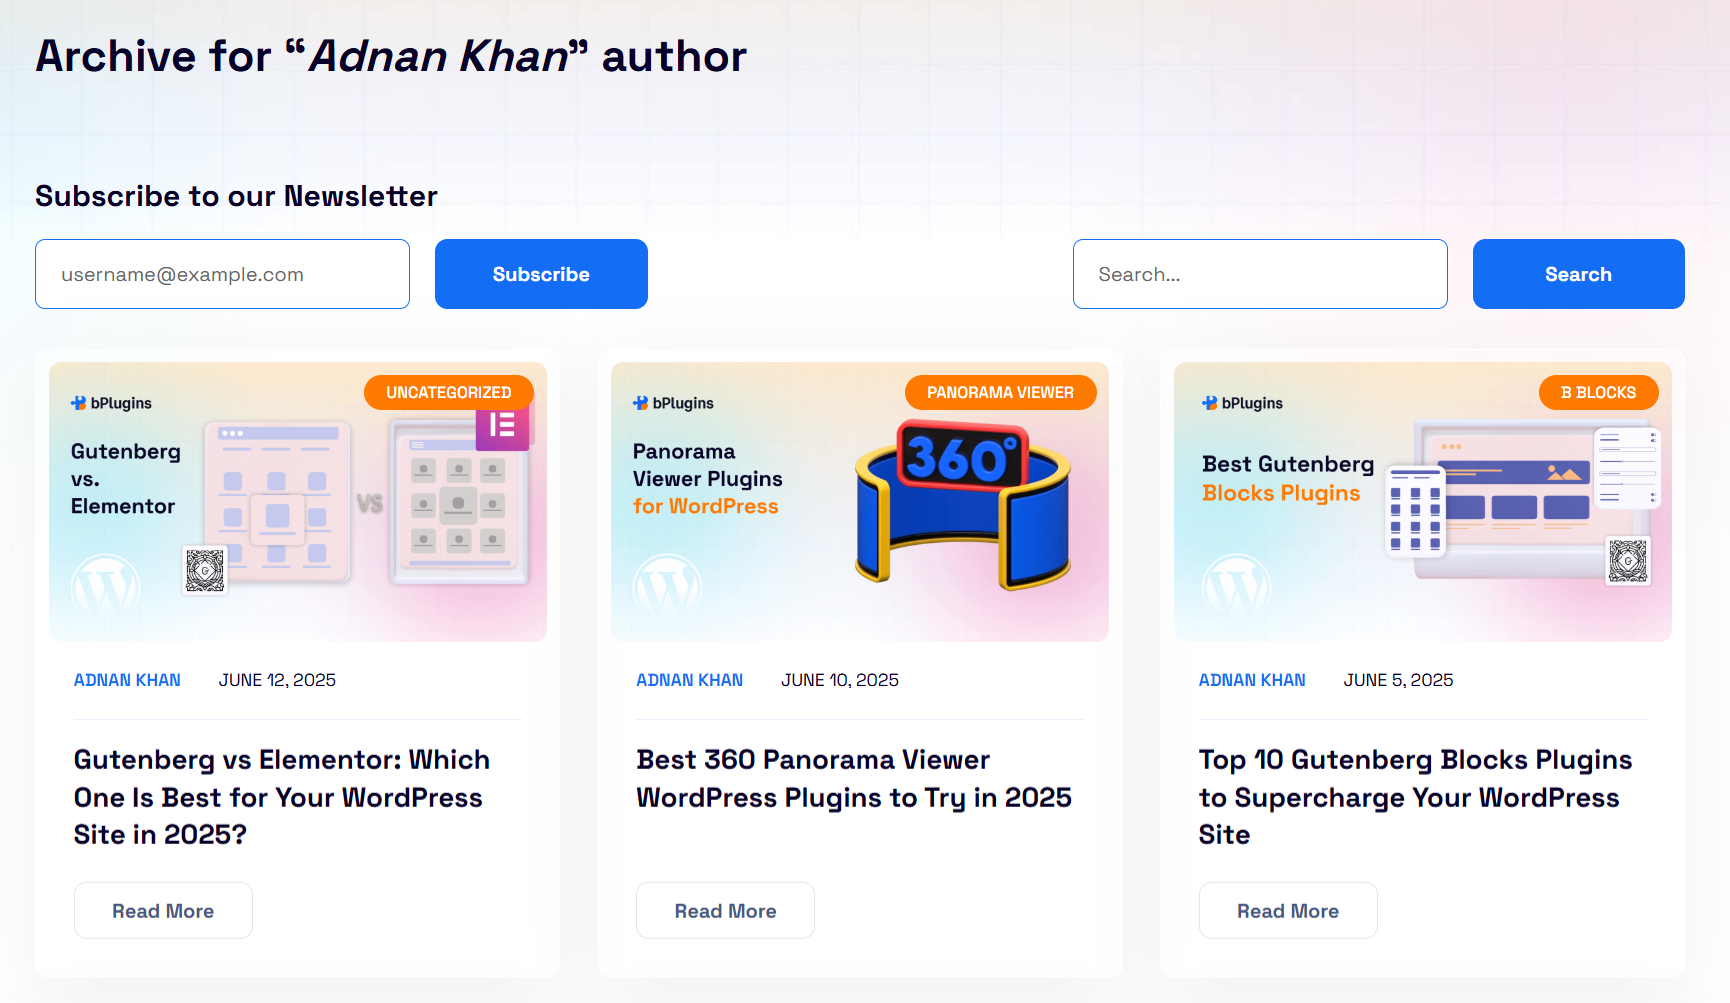
For multi-author blogs or editorial teams, displaying content by author is an excellent way to highlight contributors and their expertise. Advanced Post Block allows you to:
- Filter posts by specific authors
- Show a list of articles written by a guest blogger or team member
- Combine with author profile blocks or avatars for visual appeal
This use case is ideal for portfolios, journalism sites, or knowledge bases where author identity is important.
Related Posts Section
Boosting engagement and reducing bounce rate is easy when you show readers related posts at the end of an article. With Advanced Post Block, you can:
- Display related content based on shared categories or tags
- Use the same block on multiple posts with dynamic filtering
- Adjust styling to match your content template
This setup encourages users to keep reading and improves internal linking, both important for SEO.
Archive or Magazine-Style Pages
Instead of relying on your theme’s default archive templates, you can use Advanced Post Block to build fully customized archive pages using Gutenberg. This allows for:
- Multi-column post grids with featured images and excerpt control
- Pagination or load-more functionality
- Layout variations per category or post type
It’s a powerful way to turn static archives into interactive, well-structured content hubs.
Landing Pages with Curated Content
Want to build a niche-specific page showcasing posts from a particular topic, author, or event? With Advanced Post Block, you can create curated landing pages that:
- Pull in content dynamically using filters
- Combine multiple blocks for different categories or tags
- Maintain visual consistency with full control over design
This is especially useful for seasonal campaigns, product launches, or evergreen topic hubs like “Best Tutorials” or “Latest News.”
Conclusion
Advanced Post Block makes it easy to create custom post layouts right inside the Gutenberg editor. You don’t need extra page builders or complex setups. Just install the plugin and start designing.
Whether you want to highlight featured posts, display content by category, or build archive pages for custom post types, this plugin gives you the flexibility to do it all.
It’s a great tool for bloggers, content creators, and anyone who wants more control over how their content appears.
Give it a try and start building better layouts in minutes.